Powered by Blogger.

Butterick 4496

Butterick 4496

1980's Blouse

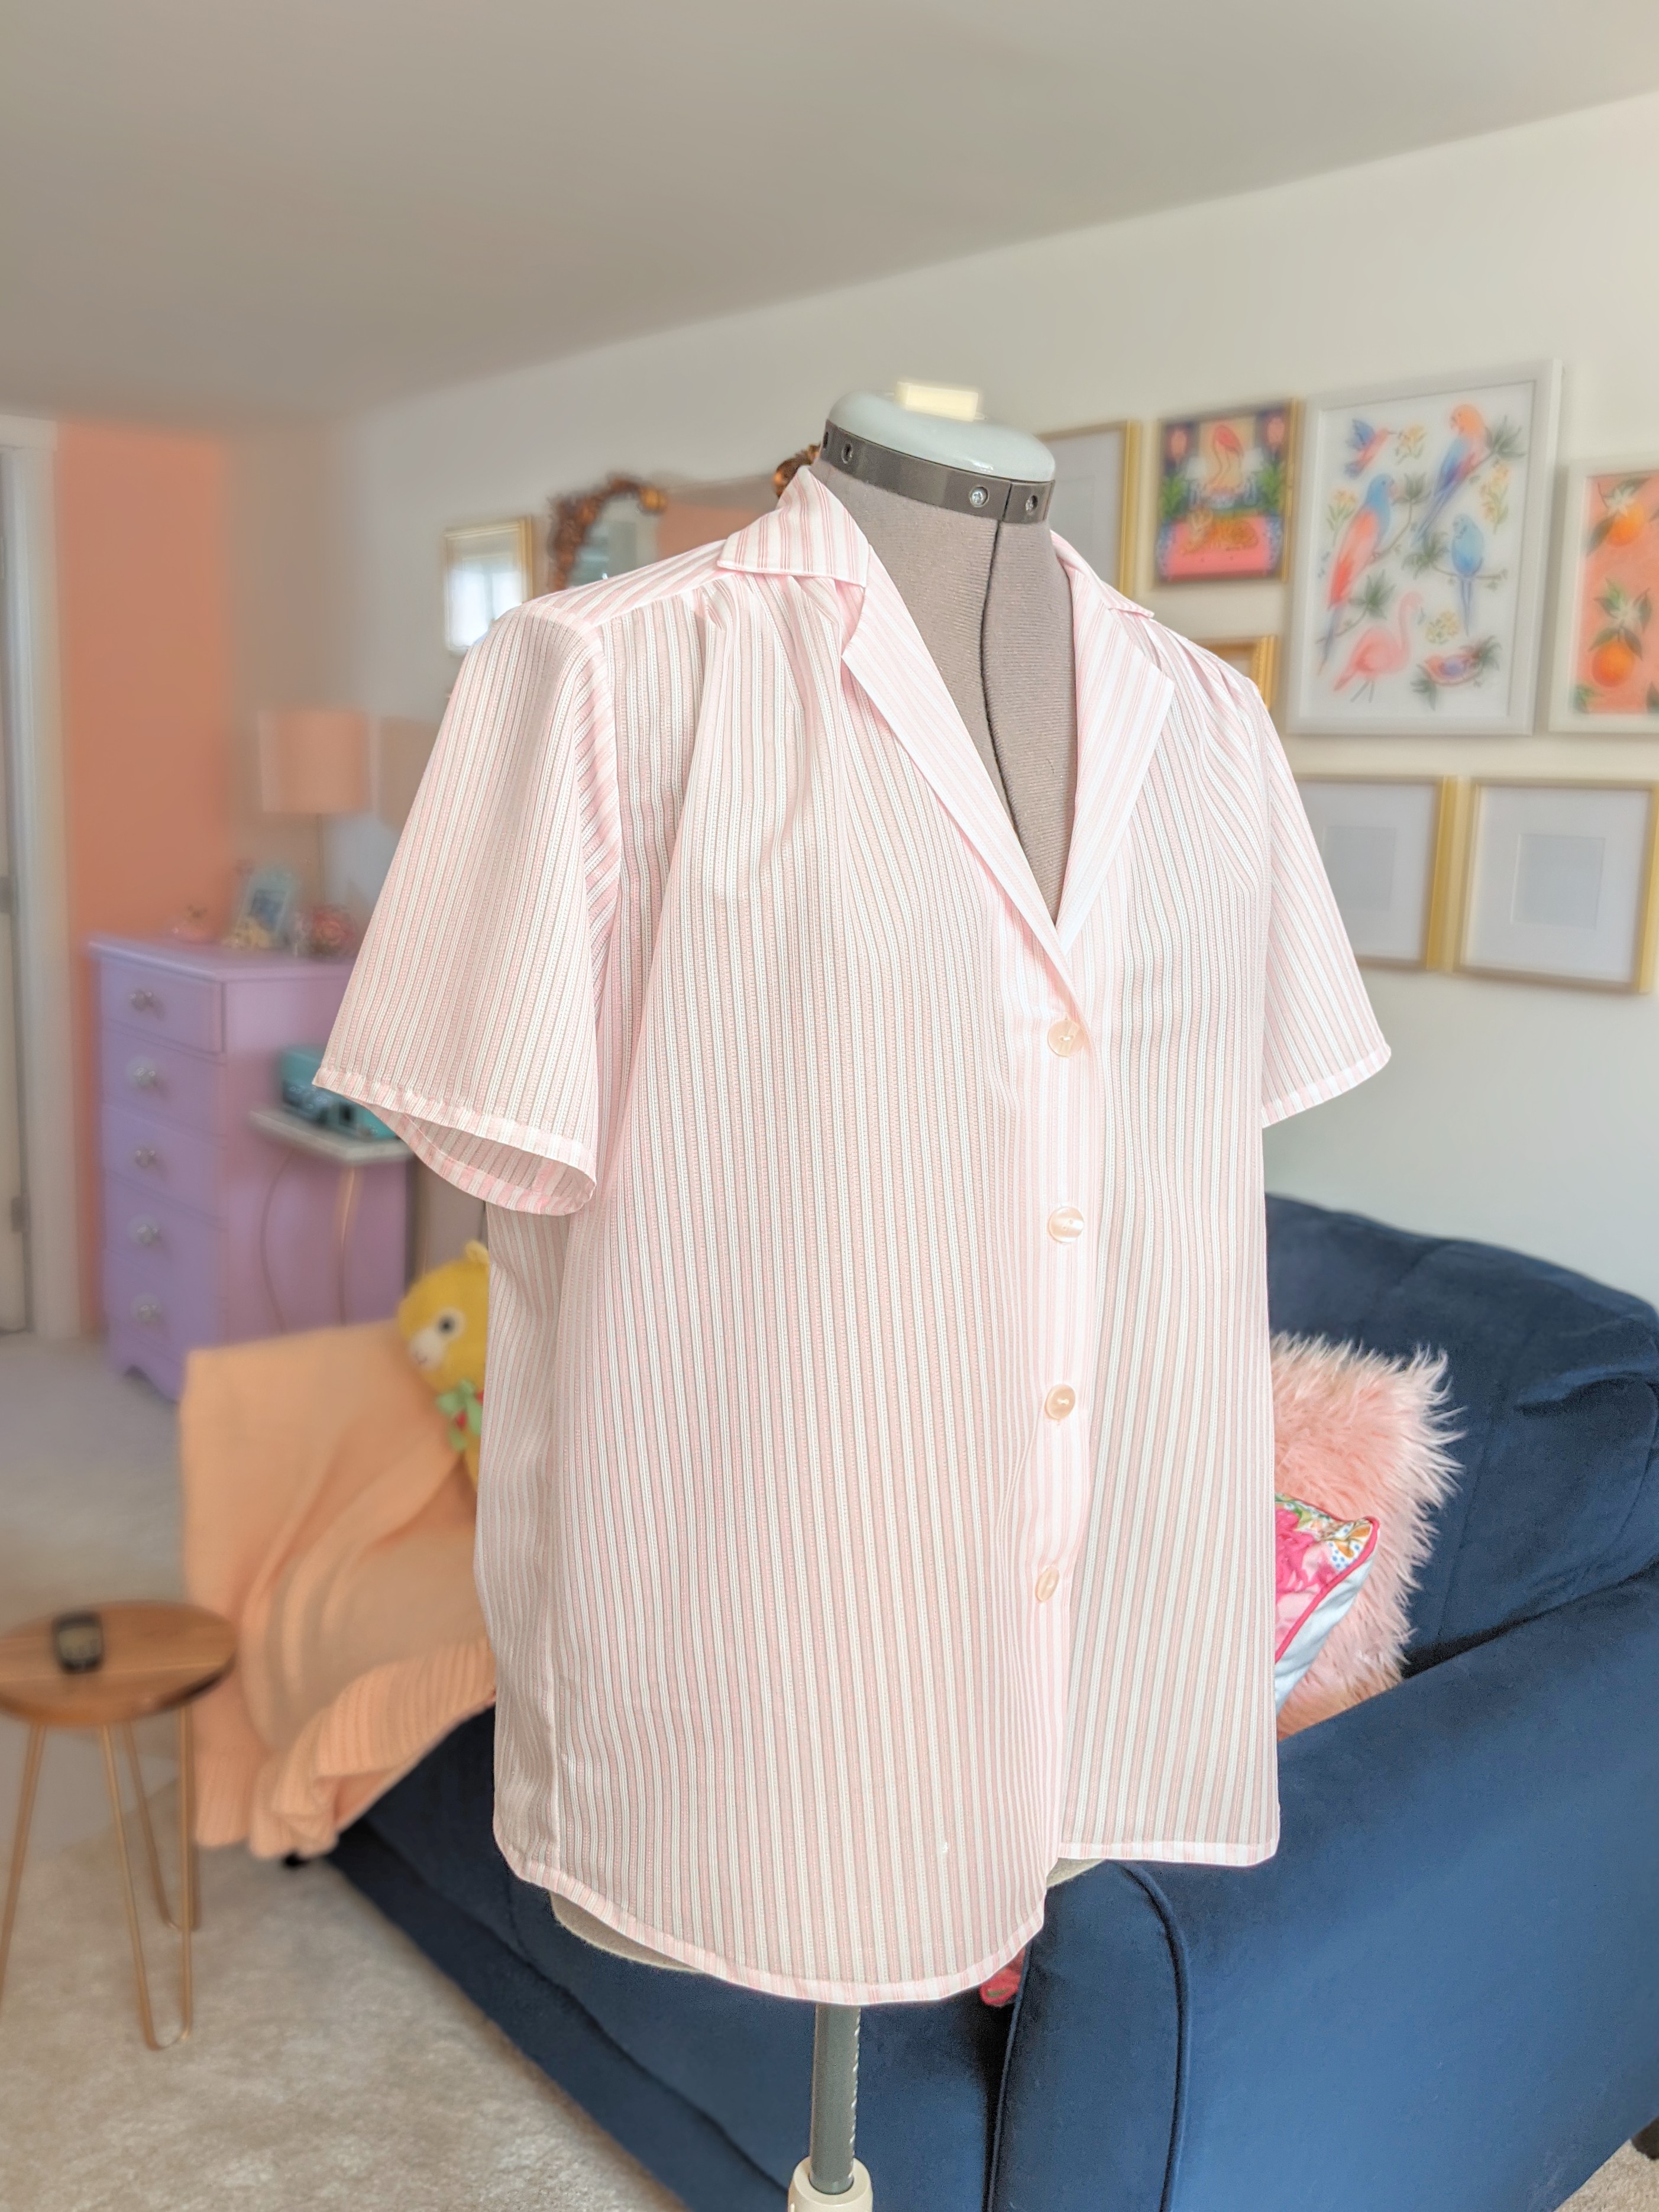
It's finally spring! Soon my garden will bloom and sunny days await me...at least that's what I'm hoping for. I'm in dire need of some summer friendly separates and I know warmer weather is on the horizon. I've decided I'm going to keep running with the 80's theme for awhile (I've been bingeing 80's movies and I'm greatly anticipating my annual rewatch of Steel Magnolias for Easter). I would like to mix and match blouses and shorts for some quick wardrobe building. I don't own many 80's blouse patterns, but this Butterick 4496 has a glamorous and feminine quality to it and it's been on my "to sew" list for awhile now. I can imagine it in a luxurious silk charmeuse, if only I had some! But for this project I decided to use a sheer ribbon like material that's been in my stash for several years. It's deeply reminiscent of the 80's and looks smashing with red lipstick!

I thought this pattern was going to be a breezy sew but several things tripped me up in the process. For starters, the previous owner did an awful job cutting out the pieces. I mean large jagged edges like someone cut it out blind folded. As such, some information was lost. I couldn't tell where the notches were located, or whether some lines were curved or straight. I had to rely on my drafting knowledge to fill in the gaps. I know that my redrafted version isn't quite right, I think the yoke ended up wider than it was supposed to be, but thankfully those problems were easy to work out during the assembly of the garment. Unlike my previous endeavors, the flat pattern measurements in this garment were fairly close to my own size, with the exception of the bust. I utilized Threads Magazine Dartless Full Bust Adjustment tutorial which I'm pleased to say really works! Yes, it's true, the hemline lays straight when worn. I highly recommend this tutorial.


After phasing out any known fit issues I proceeded with the muslin process. The instructions are fairly straight forward although I was surprised that they do not have you stay stitch the neckline, not until a few steps later, despite the fact that you handle the pattern pieces during this time. I recommend stay stitching all necklines first. Assembling the muslin went fairly well until I got to the collar unit. The instructions were slightly ambiguous. It says to clip as you go, but only after it tells you to install the collar, so I interpreted that as clip afterwards, but you are supposed to clip the neckline edge first so you can ease the collar into it. Even with the neckline pulled straight I could not get the unusually steep edge of the partial roll collar to match the neckline. I retried several times. Either the collar is missing something from when it was redrafted, or the neckline is missing something, but it would not work. I honestly felt like screaming. I had to resort to using a newly drafted straight collar instead, which was by far more manageable and better looking.

In the final project I decided to drop the angle of the lapel slightly to accommodate the new collar style (it was more curved before, probably in order to compliment the partial roll collar which has a roundness to it). Instead of gathering the bodice front and back into the yoke, I took the ease measurements and converted them into pleats and an open box pleat in the back. It looks much nicer. I had gathered the fabric when making the muslin, I found the effect was lacking, the pleats are more distinct and lay flat against the body. 

I love the yoke on this shirt, it's lined. The collar is attached to the bodice first. Then the yoke is attached to the self facing of the lapels and pressed. Afterwards, the yoke is sandwiched with the collar and exterior yoke (right sides together) and sewn. The seam is trimmed and clipped, and the yoke turned inwards, encasing all raw edges inside the lining. It looks very neat and professional. The only drawback with the yoke is that it has to be slip stitched into place at both the shoulder and back yoke seams which is quite tedious. The results, however, are worth it!


Speaking of tedious, there is a lot of slip stitching in this pattern! The placket facing, the yoke seams, and the entire hem of the shirt is slip stitched into place. I decided against hand sewing the bodice hem and instead turned it under in a similar way to the sleeve hems. I also catch stitched the collar into place to keep it from rolling up - I learned this technique from one of my sewing text books, it worked like a charm. 


One of the reasons I shy away from blouses is the buttonholes. I seem to be cursed with them. This was no exception, my buttonholes slipped under the specialty foot, so they're not perfect. It can't be helped now but next time I think I'll baste more before sewing them on my final project. 

Overall I ended up with a fun, candy striped blouse that brings back fond memories of yester year, and I can't wait to pair it with my fave sunnies and my mom jeans!

Quick Tips:

 Stay stitch all necklines first and foremost.

 Clip neckline notches before collar is installed.

 Slip stitch the back yoke seam working from the center out, once to the left and once to the right. I found doing this kept it from slipping to one side. Pins don't always hold things perfectly, it's better to be cautious! 

 If you're using a slippery material that won't sit still, try loosely catch stitching the collar onto the yoke to keep the collar from rolling up.


Simplicity 7951

Simplicity 7951

Misses' Dress (80's)

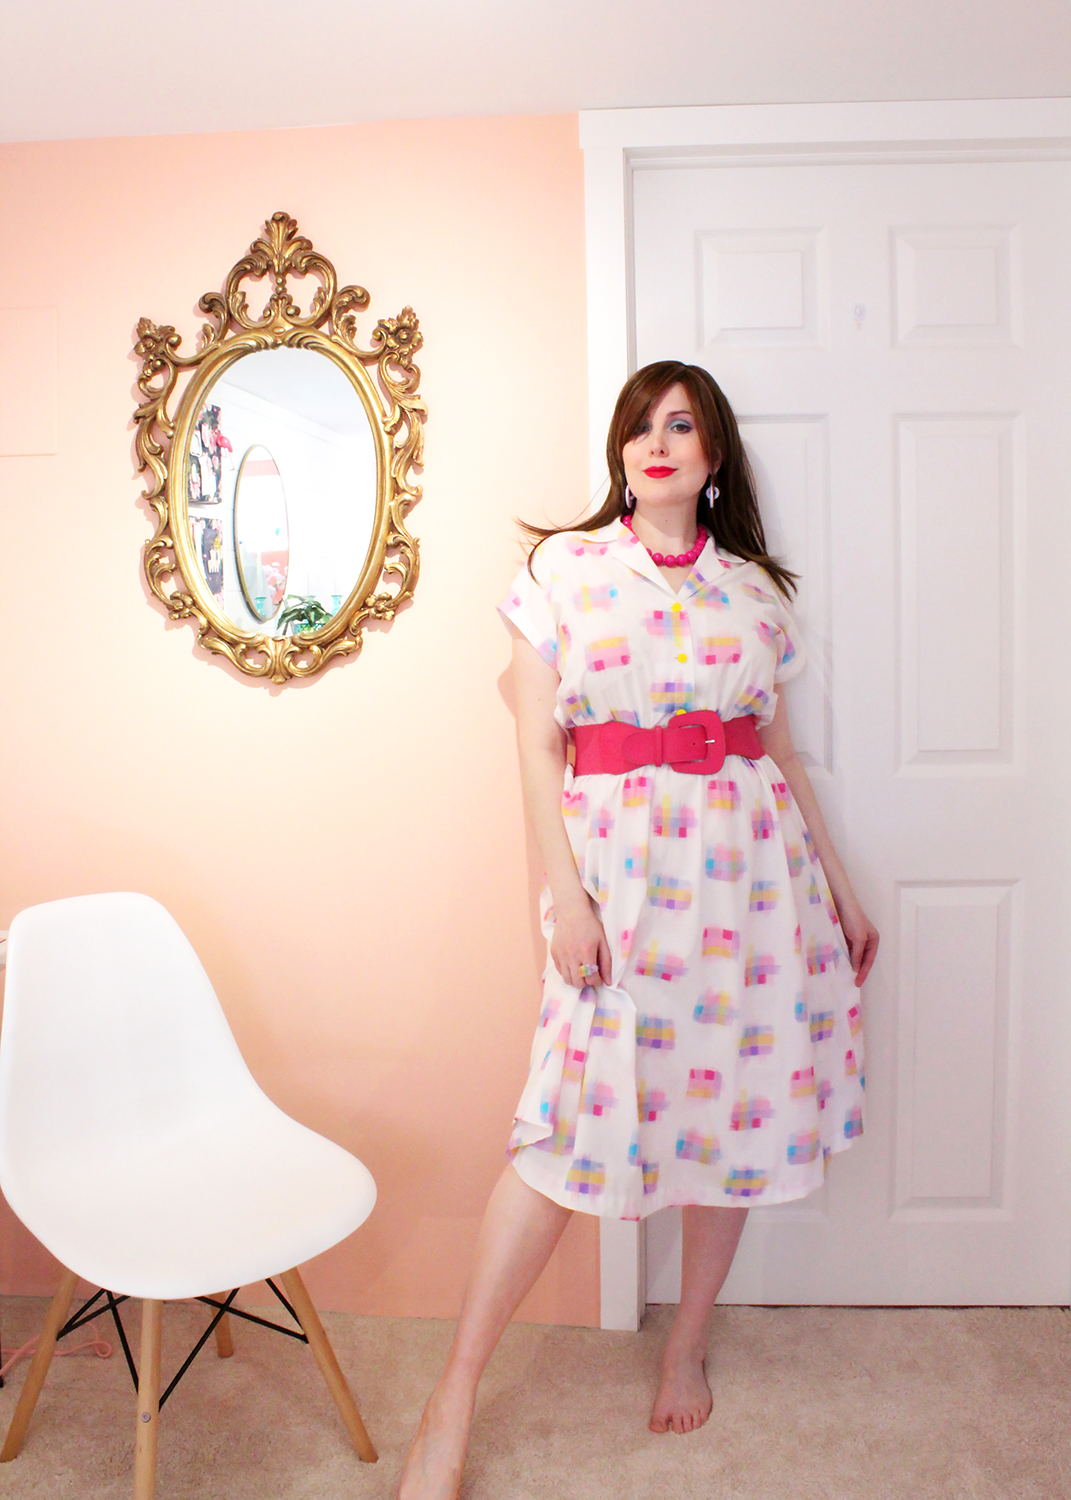
I actually finished this dress over a week ago now, I've just been waiting to get a photo of me wearing it. It's difficult to take pictures by yourself! Especially with an outdated DSLR. Thankfully I managed to snap this one good photo of me in my sewing room. 

This is Simplicity 7951, an OOP pattern from 1987 - yes, it's as old as I am! It features several variations of dress and jumpsuit styles. The waistline and skirt seam are gathered using elastic and there is a blouse front closure with functional buttons. I picked up a new term, thanks to the lovely members at PR, this garment features "blousing" which is where there is significant ease built into the bodice length creating a balloon effect. 

Sadly, the blousing exacerbates my figure flaws and I look like the dress is wearing me, hence why I am wearing a belt in the photo. It's quite lovely with a cinched waist!

This project took a little brainstorming on my part. Unfortunately, it is a secondhand pattern and often pre used patterns have problems, in this case it was a few sizes off and without an instruction manual. Thank goodness for my sewing text books! I was able to look up information on how to install a flat tailored collar, something I believe I have only done once and it was a very long time ago (and probably very poorly as I would've been a complete novice). The collar turned out nicely, although I didn't exactly enjoy slip stitching the collar shut.

I used Nancy Zieman's pivot and slide technique to increase the bust and waist size. I can't say for certain if the adjustment worked or not, because there is so much ease built into the garment I find the bodice just sort of hangs off of me. That being said though, my flat pattern measurements of the original cut size indicated it would fit my bust exactly with no ease, so it's without a doubt it needed to be increased. It's very confusing when you're not sure how the garment is supposed to look and feel. This is my first 1980's dress and I'm new to the silhouette so I wasn't sure what to expect.

I had to make up assembly as I went along. Even without instructions it's fairly straight forward. I decided to bind the armholes with self made bias tape. I also chose to use a blind hem stitch to hem the skirt. I love this technique because it looks almost invisible and I find it's less likely to twist the hem on a rounded edge. 

I assembled the bodice first and overcast the raw edges of the waistline seams on both the bodice and skirt using an overlocker. This created a clean finish inside before assembling the elastic casings. The waistline seams are pressed apart and outwards, creating a channel for the 3/8th inch elastic to go through. That's two rows of elastic. The problem with this design is that it naturally pulls against the waistline seam. I should've used a more narrow stitch length because as the material pulls across my body it pulls the seam open slightly, causing the stitches to show through. Since I wear the dress with a belt this is not a huge problem but it's something I would correct in future makes.

I finished the garment by sewing my buttonholes on using my old Kenmore Ultra Stitch. My newer brother continuously jammed during the button program and only made clean buttonholes half of the time. I wish it wasn't so unreliable as I really prefer the look of the satin stitch. My Kenmore does alright I just find the buttonholes don't las as long. I used vintage yellow shank buttons for this project, very fitting, and this is a new to me button so I learned how to hand cast them on which was a lot of fun.

I'm happy with this dress, maybe not thrilled with it. It's decent. It's very of the period. It's light and airy. So much so that I'll need to whip up a slip for underneath it! I'm not sure I would sew this pattern again but I enjoyed trying it out.