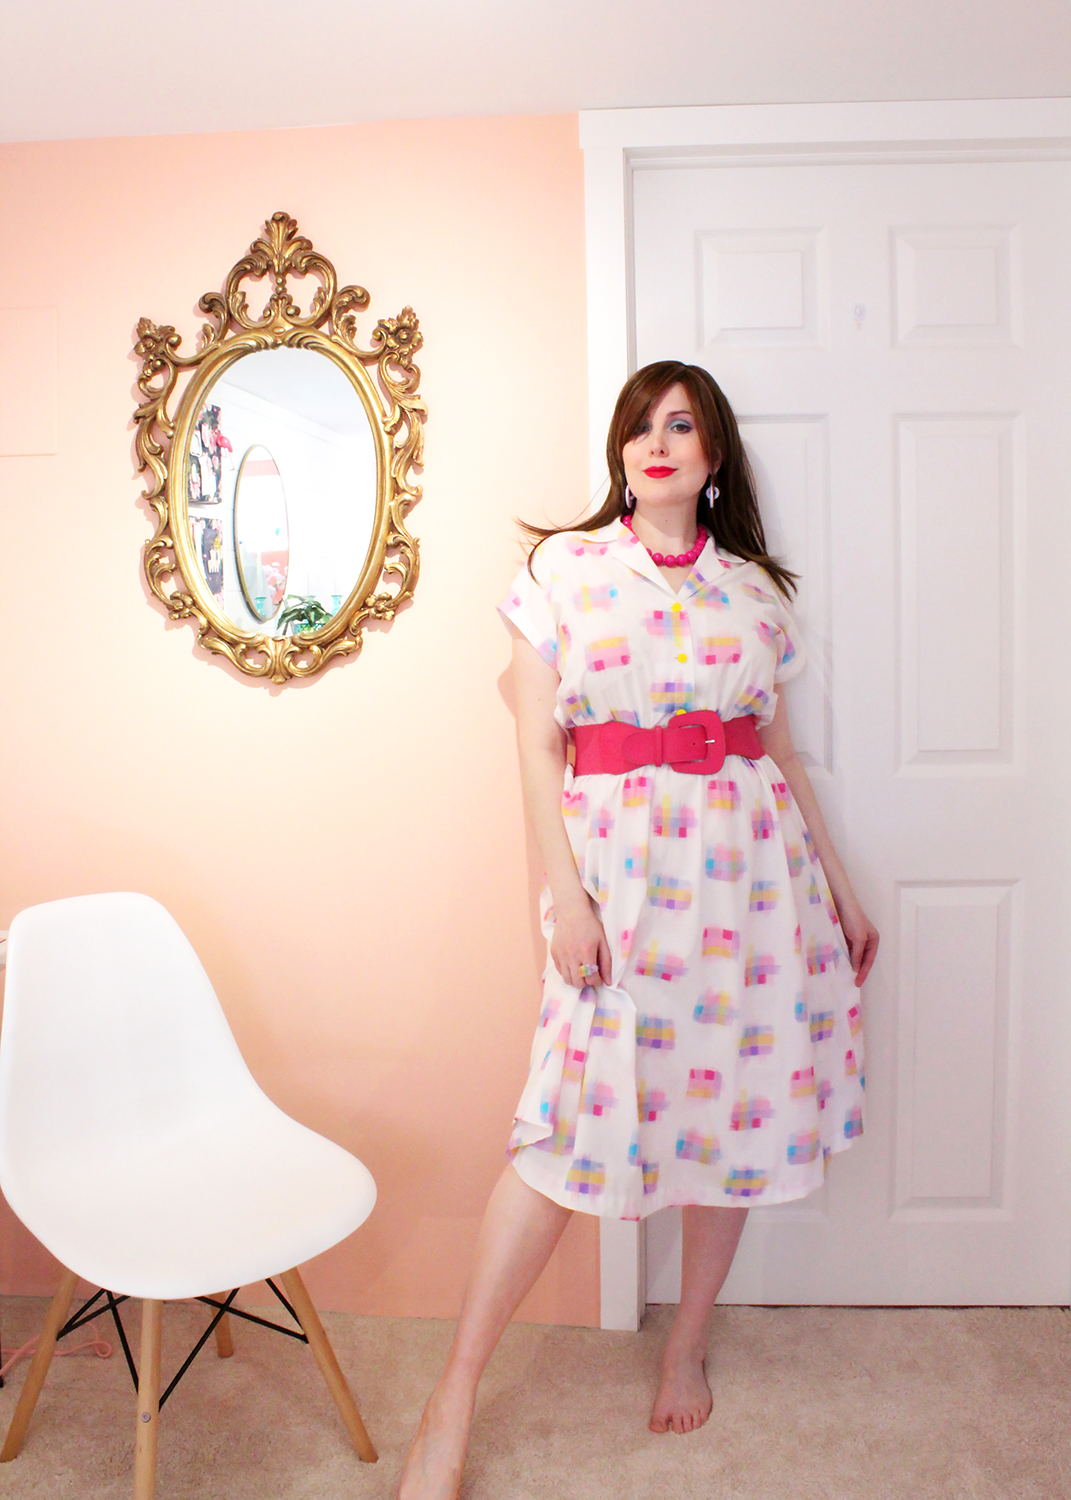
Misses' Dress (80's)
I actually finished this dress over a week ago now, I've just been waiting to get a photo of me wearing it. It's difficult to take pictures by yourself! Especially with an outdated DSLR. Thankfully I managed to snap this one good photo of me in my sewing room.
This is Simplicity 7951, an OOP pattern from 1987 - yes, it's as old as I am! It features several variations of dress and jumpsuit styles. The waistline and skirt seam are gathered using elastic and there is a blouse front closure with functional buttons. I picked up a new term, thanks to the lovely members at PR, this garment features "blousing" which is where there is significant ease built into the bodice length creating a balloon effect.
Sadly, the blousing exacerbates my figure flaws and I look like the dress is wearing me, hence why I am wearing a belt in the photo. It's quite lovely with a cinched waist!
This project took a little brainstorming on my part. Unfortunately, it is a secondhand pattern and often pre used patterns have problems, in this case it was a few sizes off and without an instruction manual. Thank goodness for my sewing text books! I was able to look up information on how to install a flat tailored collar, something I believe I have only done once and it was a very long time ago (and probably very poorly as I would've been a complete novice). The collar turned out nicely, although I didn't exactly enjoy slip stitching the collar shut.
I used Nancy Zieman's pivot and slide technique to increase the bust and waist size. I can't say for certain if the adjustment worked or not, because there is so much ease built into the garment I find the bodice just sort of hangs off of me. That being said though, my flat pattern measurements of the original cut size indicated it would fit my bust exactly with no ease, so it's without a doubt it needed to be increased. It's very confusing when you're not sure how the garment is supposed to look and feel. This is my first 1980's dress and I'm new to the silhouette so I wasn't sure what to expect.
I had to make up assembly as I went along. Even without instructions it's fairly straight forward. I decided to bind the armholes with self made bias tape. I also chose to use a blind hem stitch to hem the skirt. I love this technique because it looks almost invisible and I find it's less likely to twist the hem on a rounded edge.
I assembled the bodice first and overcast the raw edges of the waistline seams on both the bodice and skirt using an overlocker. This created a clean finish inside before assembling the elastic casings. The waistline seams are pressed apart and outwards, creating a channel for the 3/8th inch elastic to go through. That's two rows of elastic. The problem with this design is that it naturally pulls against the waistline seam. I should've used a more narrow stitch length because as the material pulls across my body it pulls the seam open slightly, causing the stitches to show through. Since I wear the dress with a belt this is not a huge problem but it's something I would correct in future makes.
I finished the garment by sewing my buttonholes on using my old Kenmore Ultra Stitch. My newer brother continuously jammed during the button program and only made clean buttonholes half of the time. I wish it wasn't so unreliable as I really prefer the look of the satin stitch. My Kenmore does alright I just find the buttonholes don't las as long. I used vintage yellow shank buttons for this project, very fitting, and this is a new to me button so I learned how to hand cast them on which was a lot of fun.
I'm happy with this dress, maybe not thrilled with it. It's decent. It's very of the period. It's light and airy. So much so that I'll need to whip up a slip for underneath it! I'm not sure I would sew this pattern again but I enjoyed trying it out.


No comments
Please use respect when commenting! Any self promotion or links left in the comments will be flagged as spam.